Today I connected the backup camera video signal to the Hamilton unit successfuly. It's very easy, although I am still going to install a filter rectifier (which should be pretty easy) that I'll talk about at the end of this post.
I have the basic 2010 RX350 with the backup camera video display in the rear view mirrow which everyone universally dislikes.
I installed the Hamilton radio and I like it. However, there is no Hamilton solution for connecting the backup camera video signal to the Hamilton unit. I noted that when the car is placed in Reverse, that the Hamilton display switches over automatically (with a black display screen), so I figured I just need to get it connected and after some research it's pretty easy.
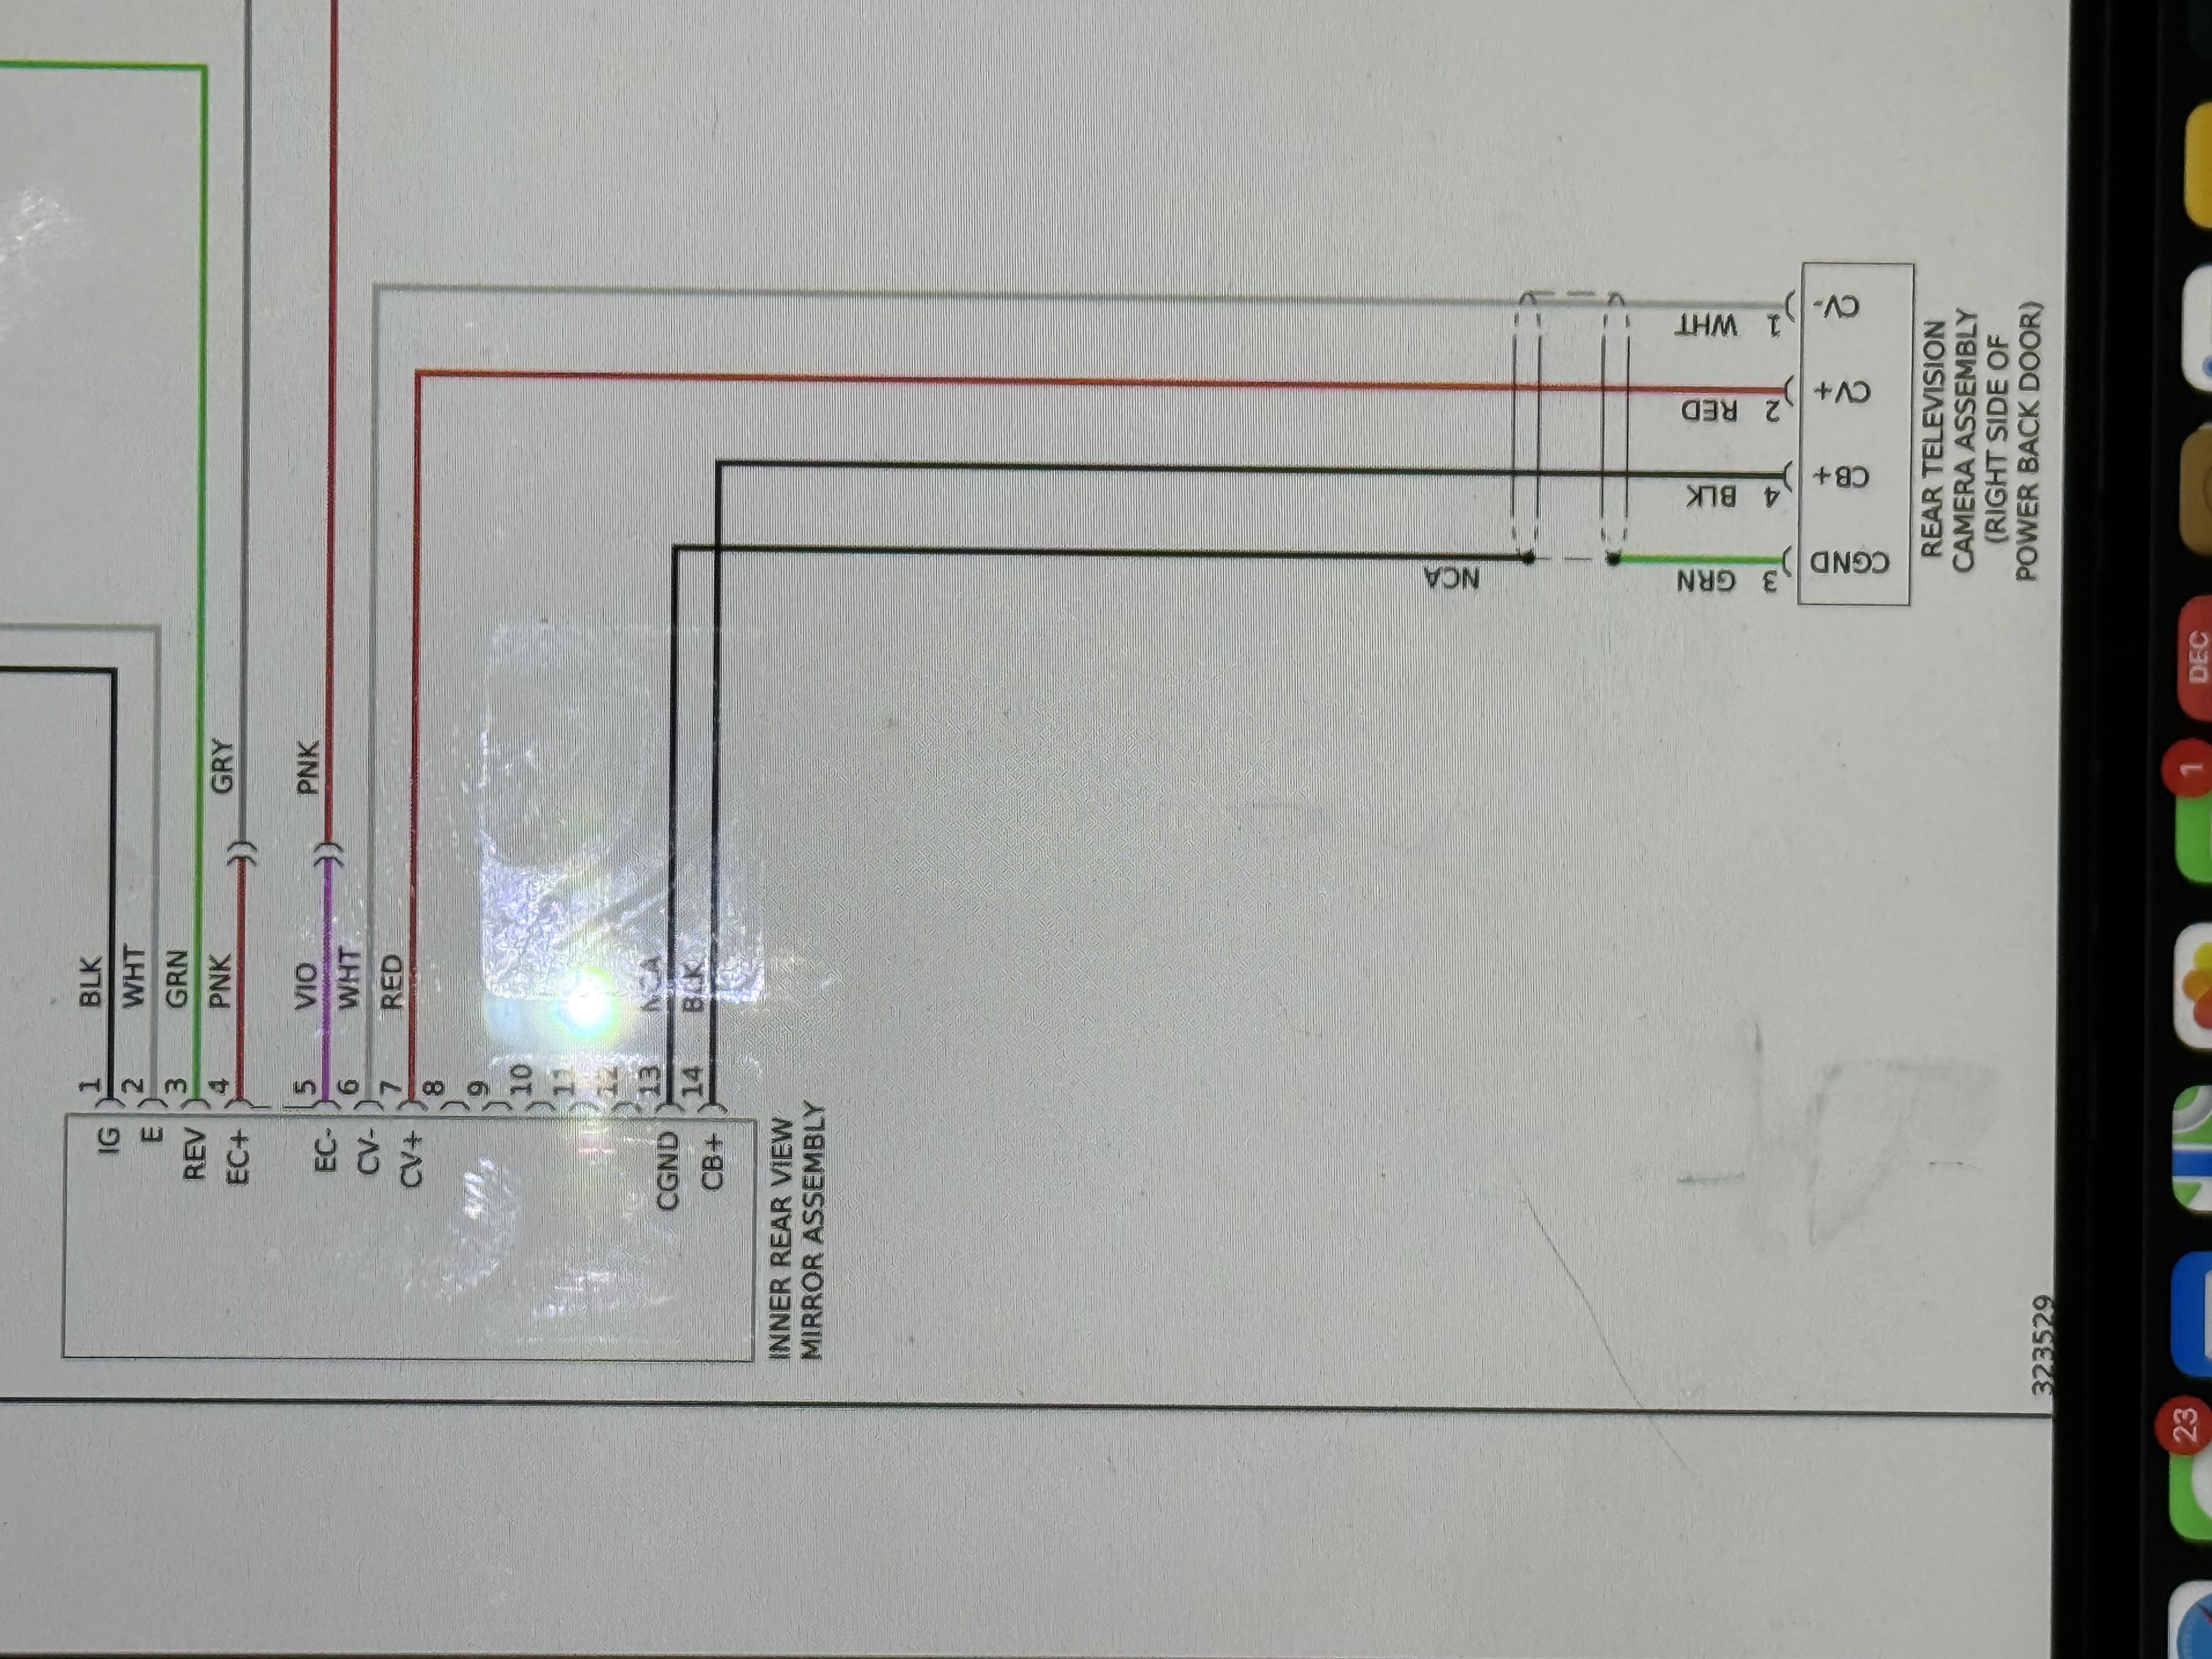
1. Pop off the wiring cover behind the rear view mirror. You'll see the white wiring harness connector. Review the Lexus wiring diagram below and note that the wiring harness colors correspond as below: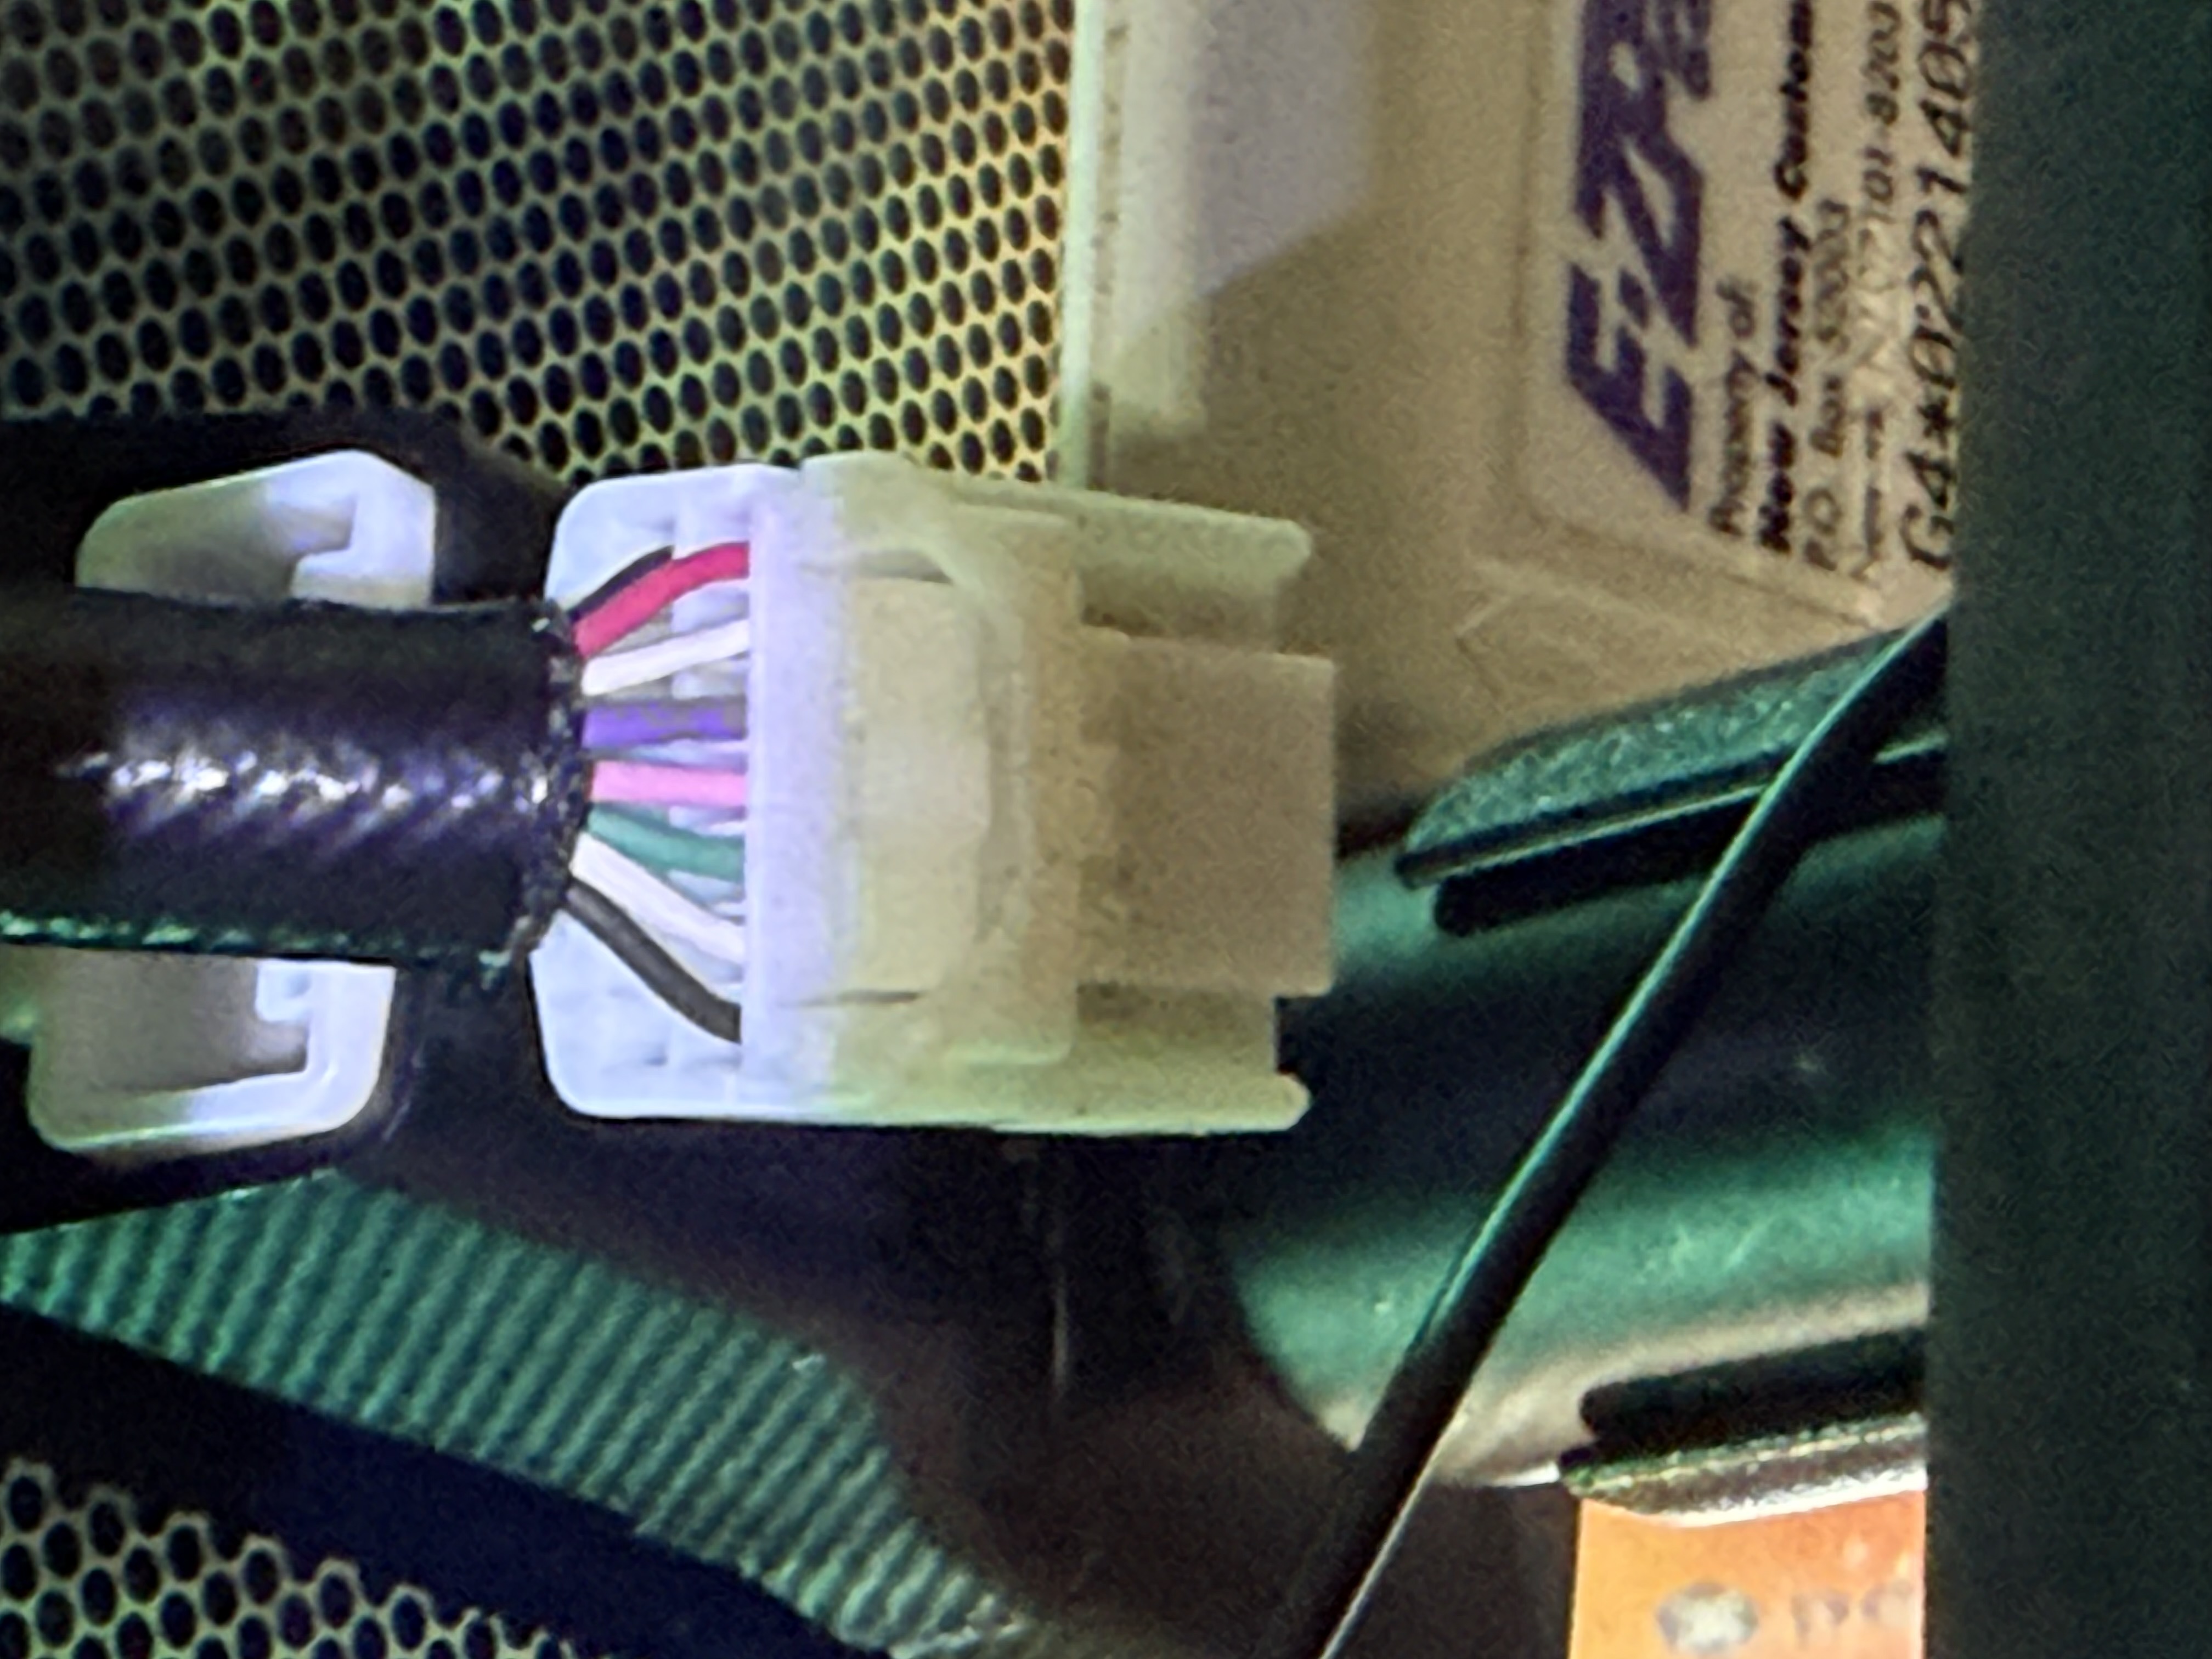
- Camera Video + (CV+) is the red wire in the picture. That's the video signal that you need to provide to the Hamilton Camera RCA video input. So I bought an RCA to bare wire cable from Amazon: https://amzn.to/4jgB5ph. To test it, I inserted the RCA cable red wire into the back of the wiring harness and connected the male RCA connector into the Hamilton female RCA input for the camera. Voila! There was the video signal.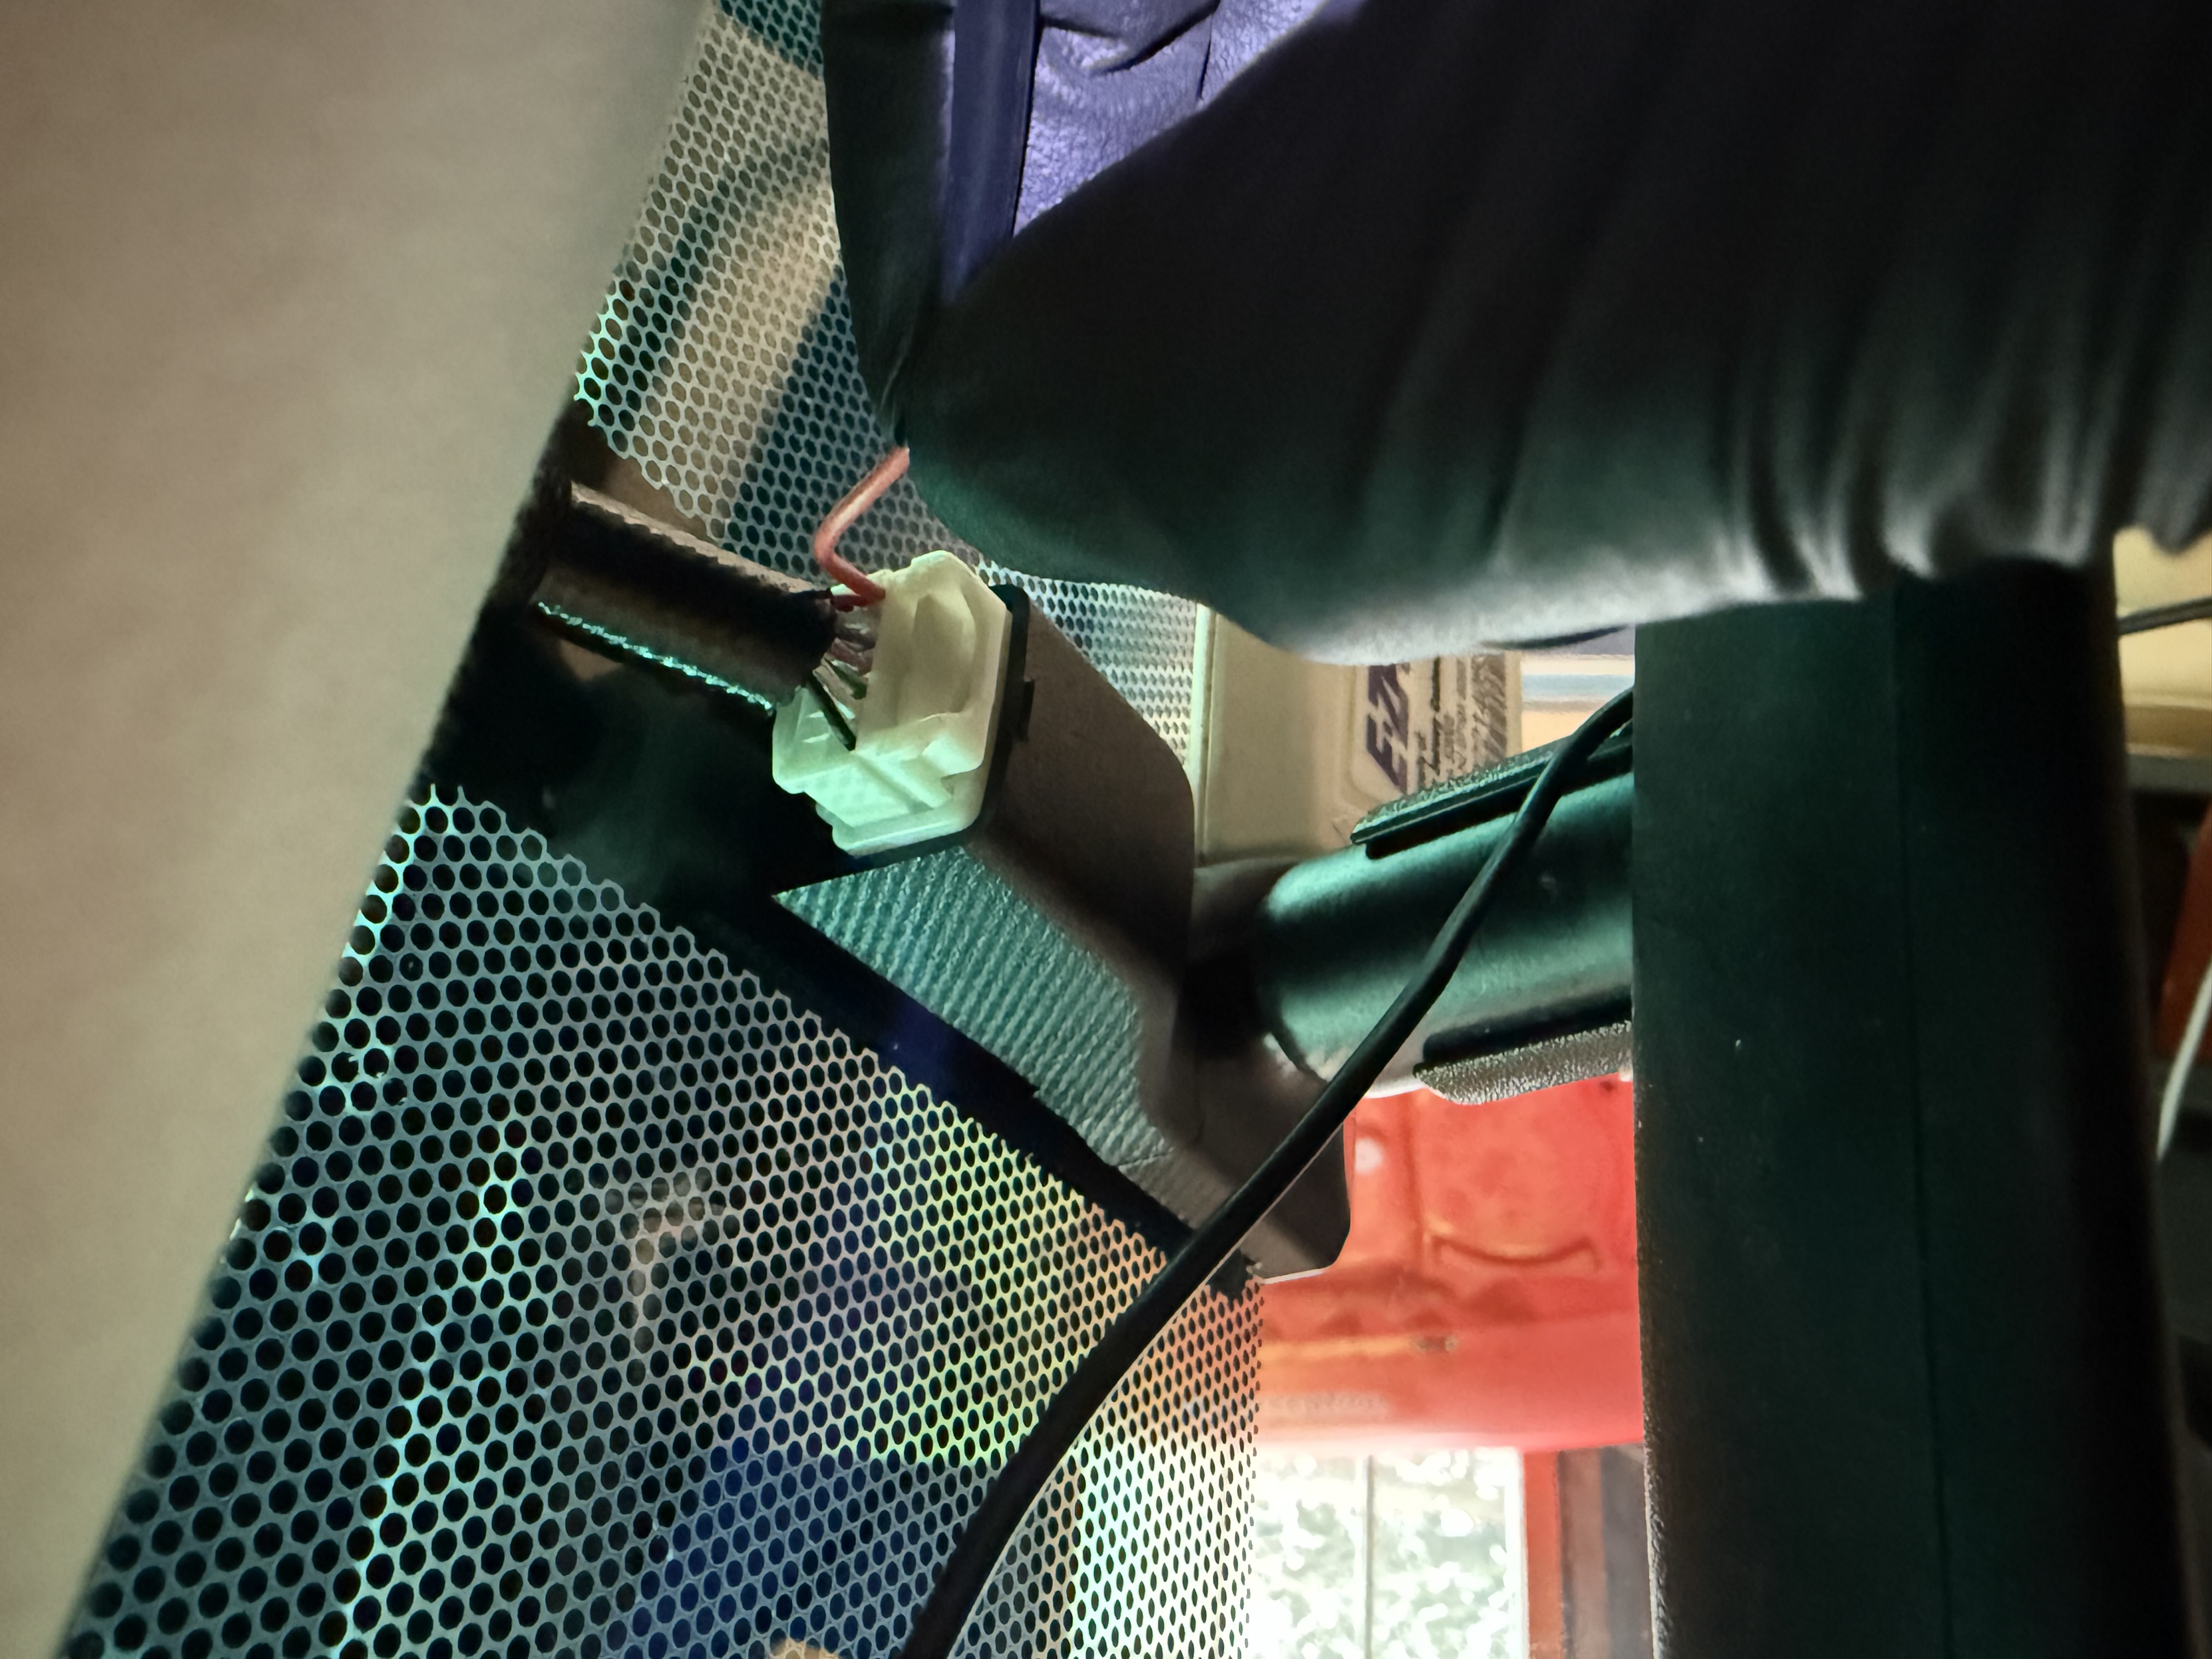
While the video signal was identical, you will see some light wavy lines cascading through the picture. This is because you are patching into an analog video signal and is a normal side effect. You will eliminate this artifact in the next step by disconnecting the video signal to the rear view mirror and having the video signal go exclusively to the Hamilton unit.
So, you have two options: you can splice into this wire (or cut it), which is feasible, by connecting the inner wire of a RCA cable. Alternatively, you can do what I did (the easier, slightly more expensive option). Buy the Dash Cam Power Adapter from Amazon: https://amzn.to/3MUg2wA which is intended to provided direct DC power for a dash cam. If you use it like I outline below, you can still use it for dash cam power but I wasn't interested in doing that.
- Next, connect the Dash Cam Power Adapter wiring harness between the Lexus wiring harness coming from the headliner (the ceiling cover) and the rear view mirror harness cover: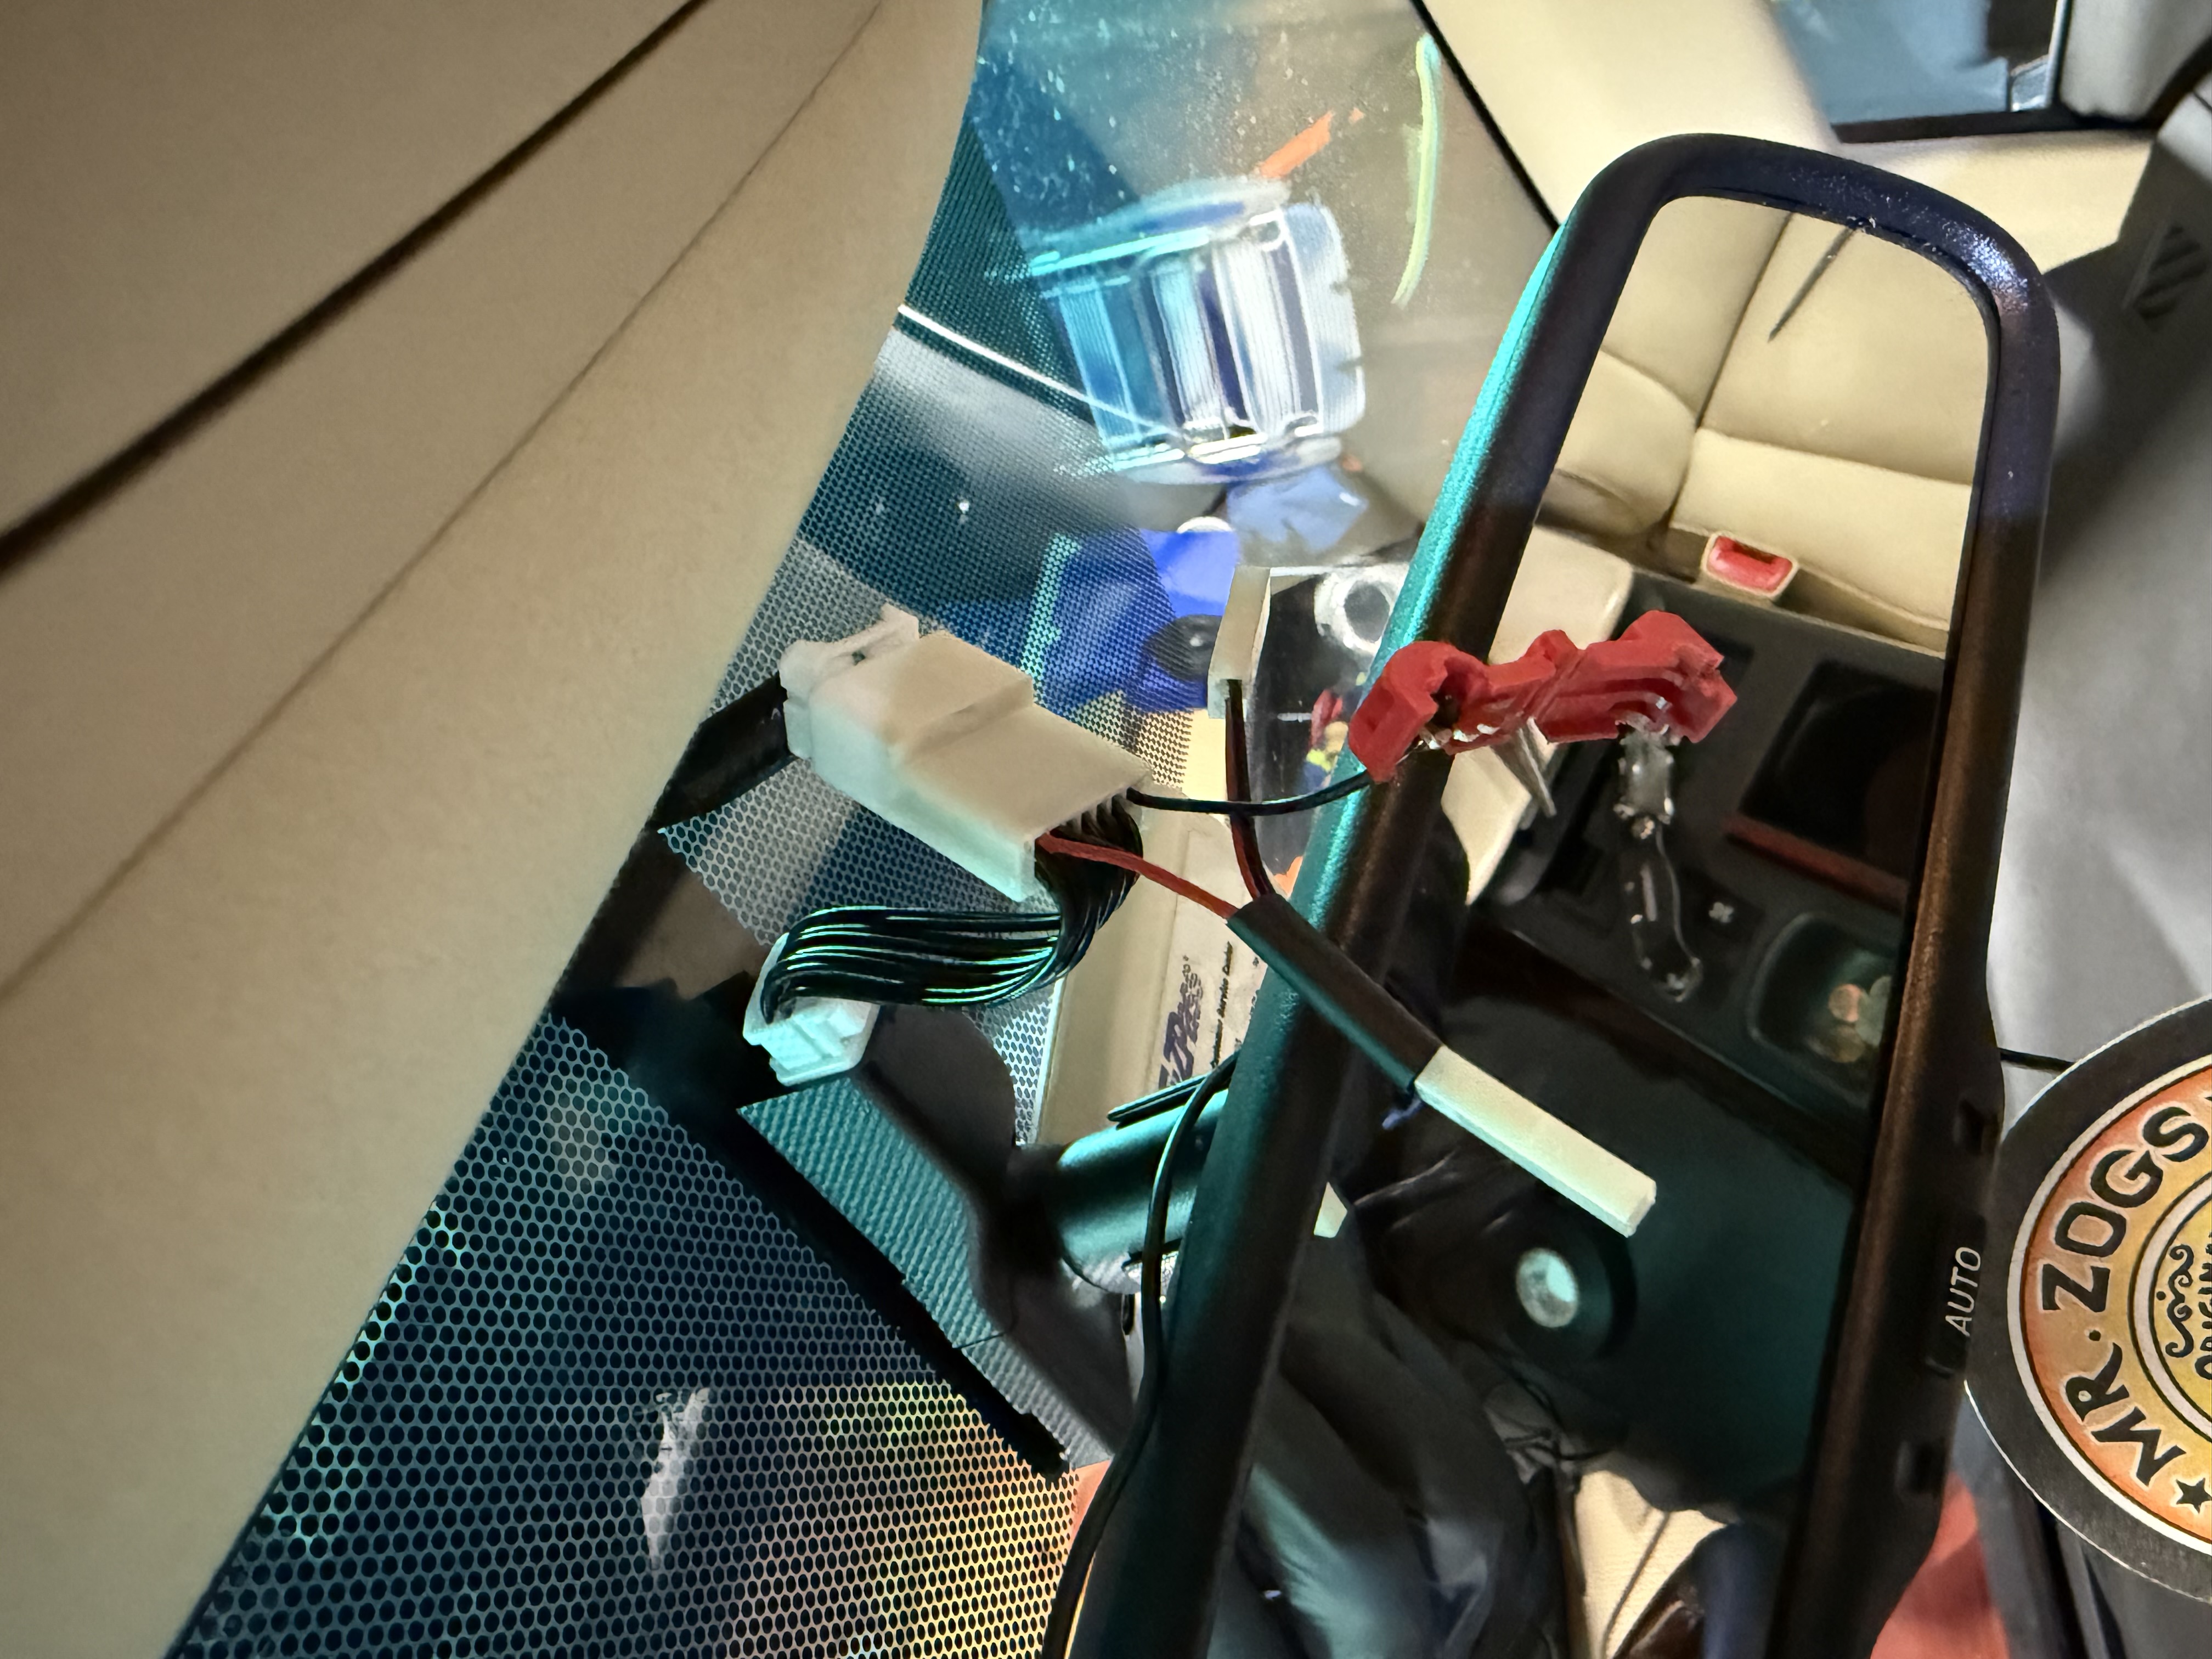
- I cut the the Dash Cam Power Adapter harness wire that corresponds to the red CV+ wire mentioned above. I tapped into this wire using the red splice you see in the picture, connecting the red RCA wire. I covered the black RCA wire in electrical tape as it is not used.
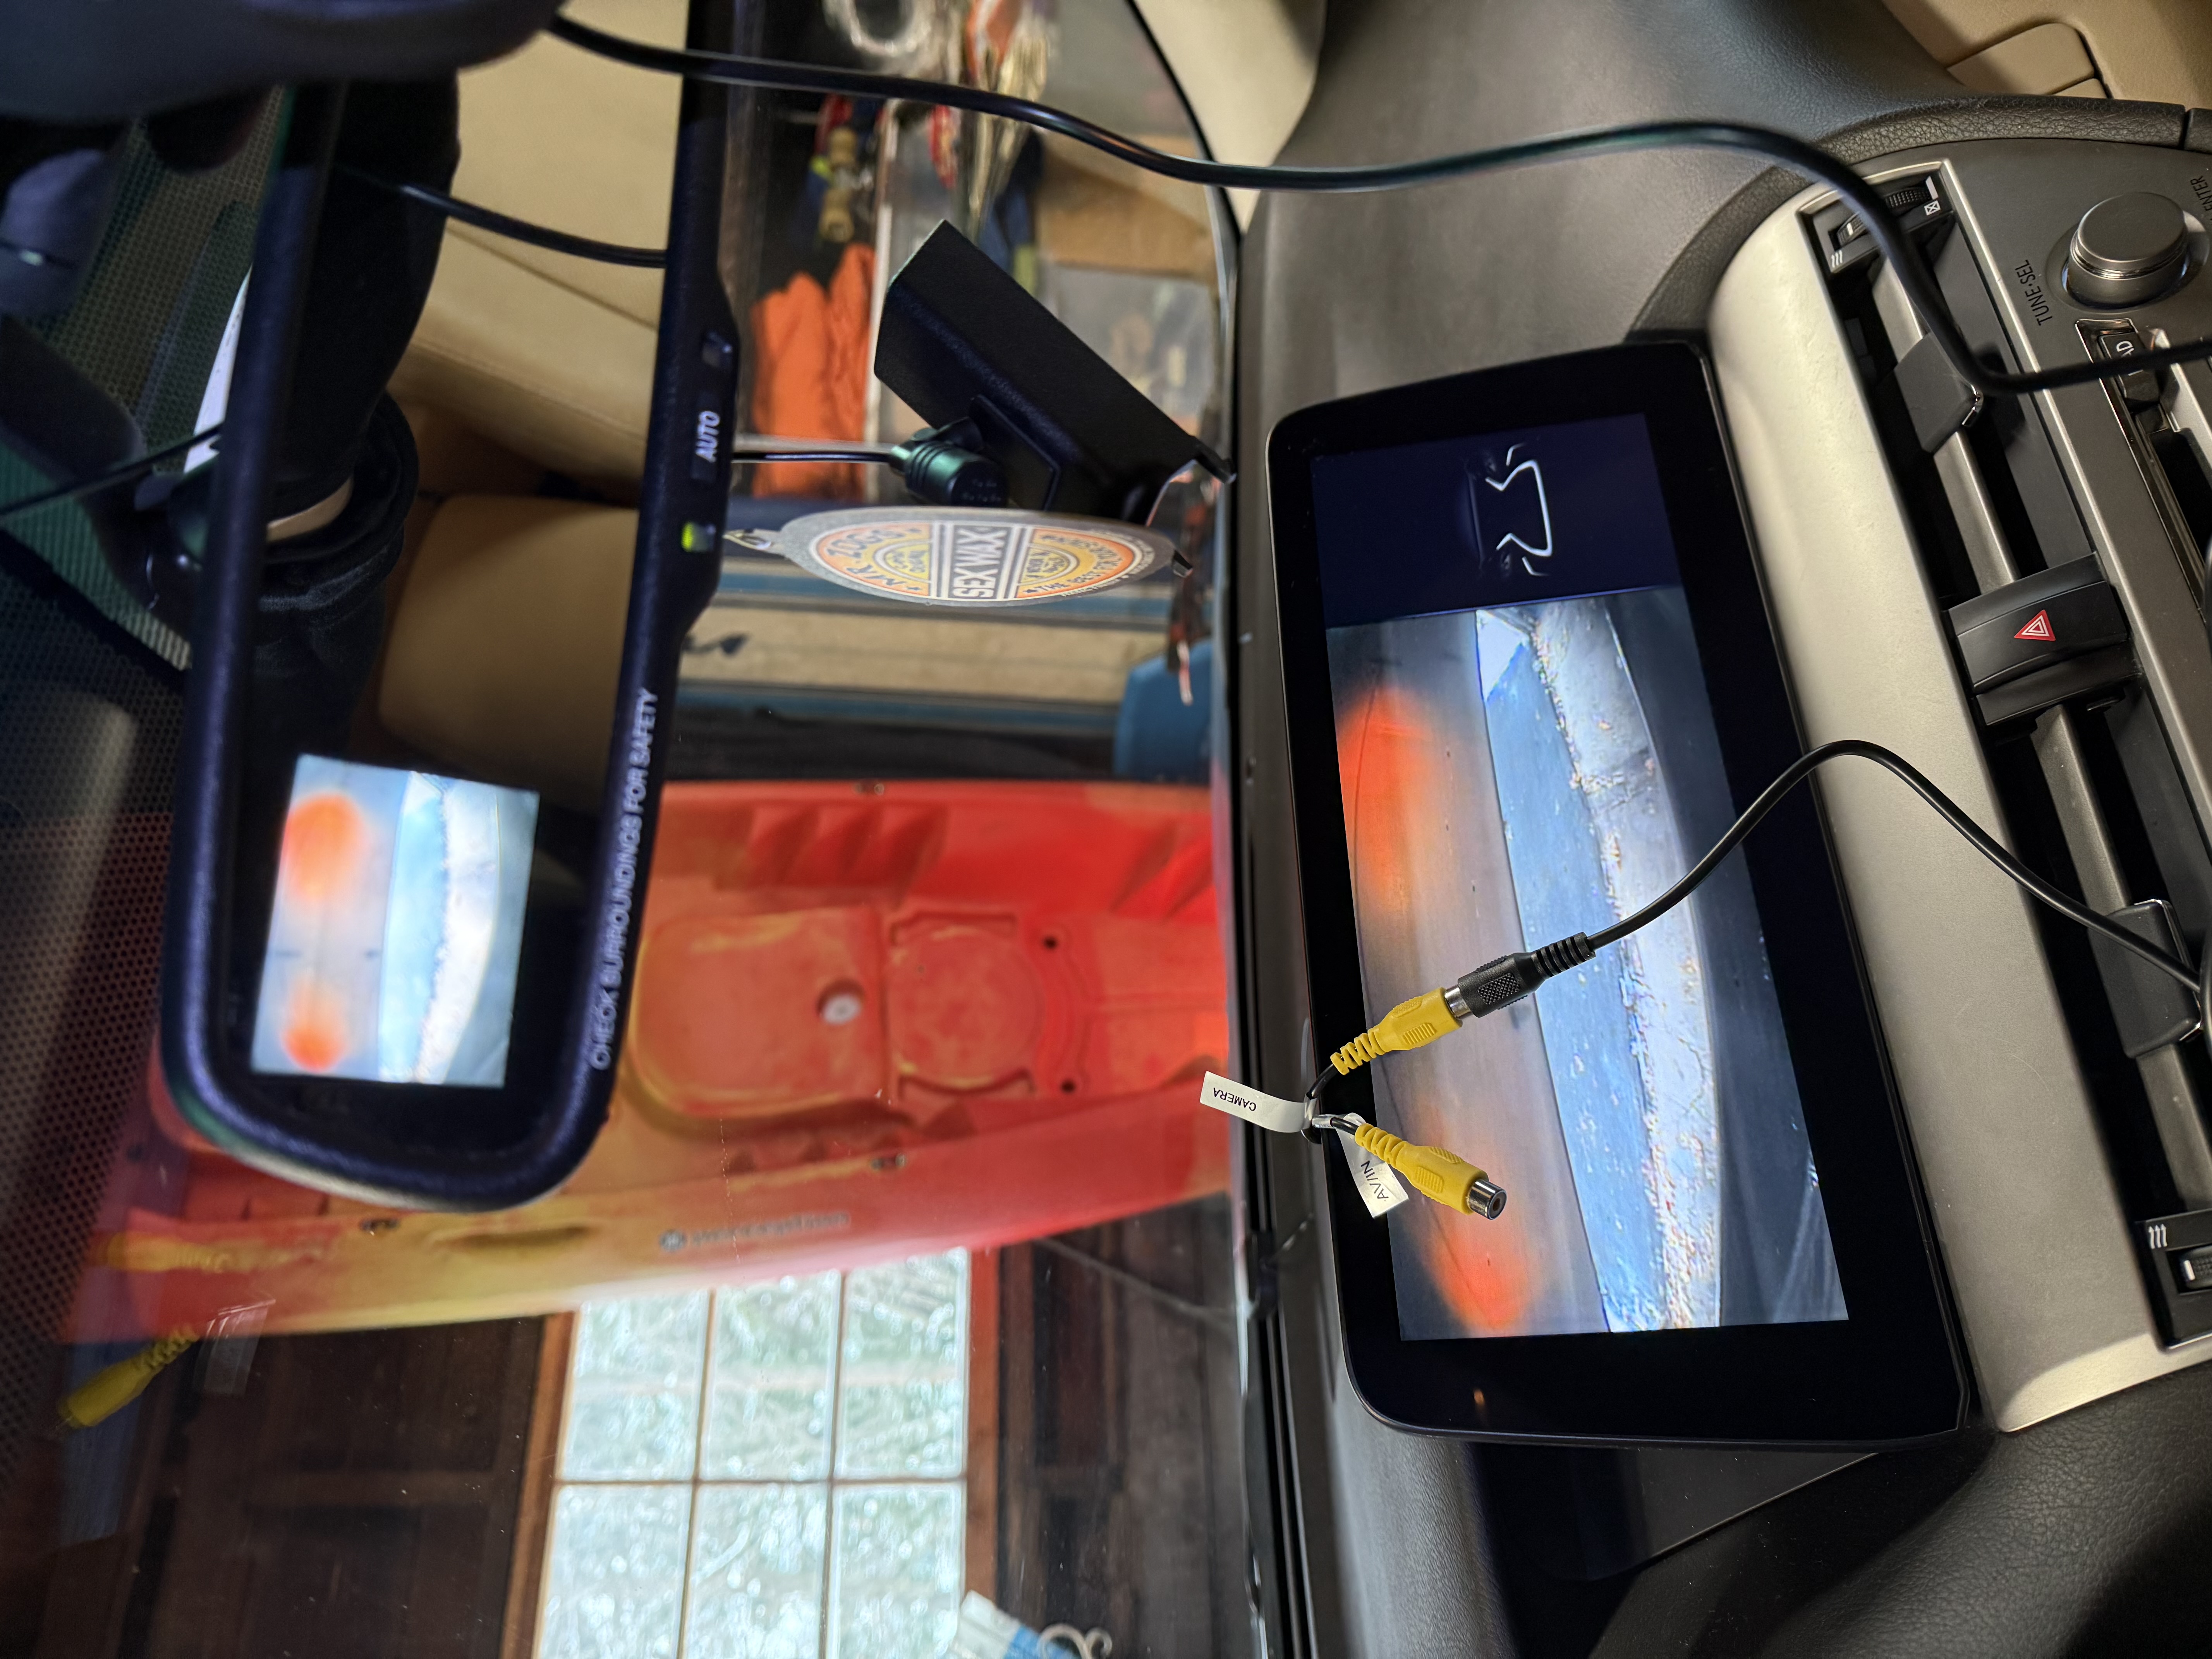
- I then tested the setup again. (I've attached the video clip). As you put the car into reverse, the Hamilton display switches over normally and displays the backup video. Simultaneously, the video display in the rear view camera illuminates in dark black color for about two seconds and then it turns itself off. It's not a nuisance or anything. During that two second span, you will see the light wavy lines in the video display that I mentioned above, and then they disappear.
-Following this, I tucked the Dash Cam power adapter wiring harness into the headliner easily and covered the original rear view harness with the Lexus wire cover. You'll never see that there is a new harness there at all.
- I then tucked the RCA video wire inside the headliner on the driver's side, down the side and had the wire enter the dash from the side panel (the one you pulled off during the original installation). I then had the RCA wire go above the steering wheel assembly. This RCA wire is nearly exactly the correct length for this installation. In order to finish it, pull the Hamilton RCA wire inputs down towards the driver's side underside dash and you will be able to connect the RCA cable to the Camera input. Use electrical tape to secure the connection. Then reinstall the Hamilton display unit.
- Final observations: the video quality provided by the original Lexus camera is not that great (it never was on the rear view mirror). So having it on the big screen is not high resolution. However, it definitely improves the utility and safety of the backup camera considerably.
- Next step: I did install a power rectifier ($9.99 on Amazon) to provide a cleaner power source to the backup camera but it did not improve video quality. I'm fine with the video quality, and the backup camera is much more usable and safer when connected to the Hamilton unit.